Build a Simple LMS-Integrated Quiz App Using Python, React.js, and LTI 1.3 – Part 2

Check out part one first — where we walk through the setup of the Flask backend: Build a Simple LMS-Integrated Quiz App Using Python, React.js, and LTI 1.3 – Part 1

Part 2 – Flask and implementing LTI-related routes

Picking up where we left off in the app.py file in our project root directory

###############################################################
# LTI-related routes
###############################################################

@app.route('/login/', methods=['GET', 'POST'])
def login():
    tool_conf = ToolConfJsonFile(get_lti_config_path())
    launch_data_storage = get_launch_data_storage()
    flask_request = FlaskRequest()

    target_link_uri = flask_request.get_param('target_link_uri')
    if not target_link_uri:
        raise Exception('Missing "target_link_uri" param')

    oidc_login = FlaskOIDCLogin(
        flask_request,
        tool_conf,
        launch_data_storage=launch_data_storage
    )

    return oidc_login\
        .enable_check_cookies()\
        .redirect(target_link_uri)

The above function contains some elements that we will see repeat in the following – such as the tool conf, FlaskRequest, and launch data storage. The login route is used to invoke an LTI 1.3 launch where you first receive a login initialization request and return to the platform. The request is handled by first creating a new OIDCLogin object. An exception is raised if an OIDC registration or redirect url doesn’t exist.

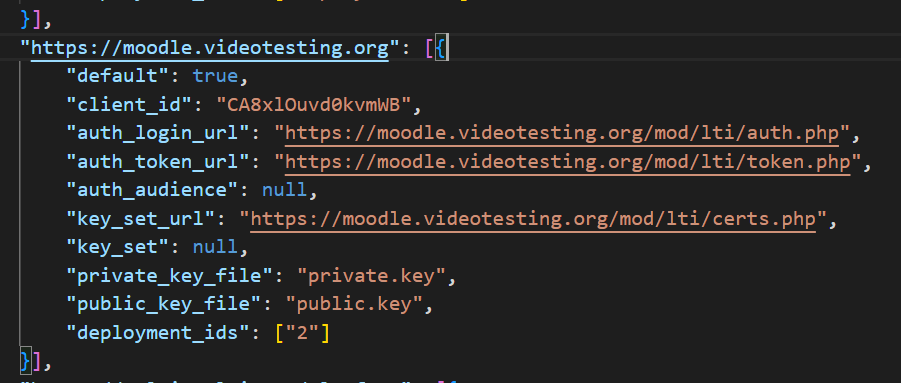
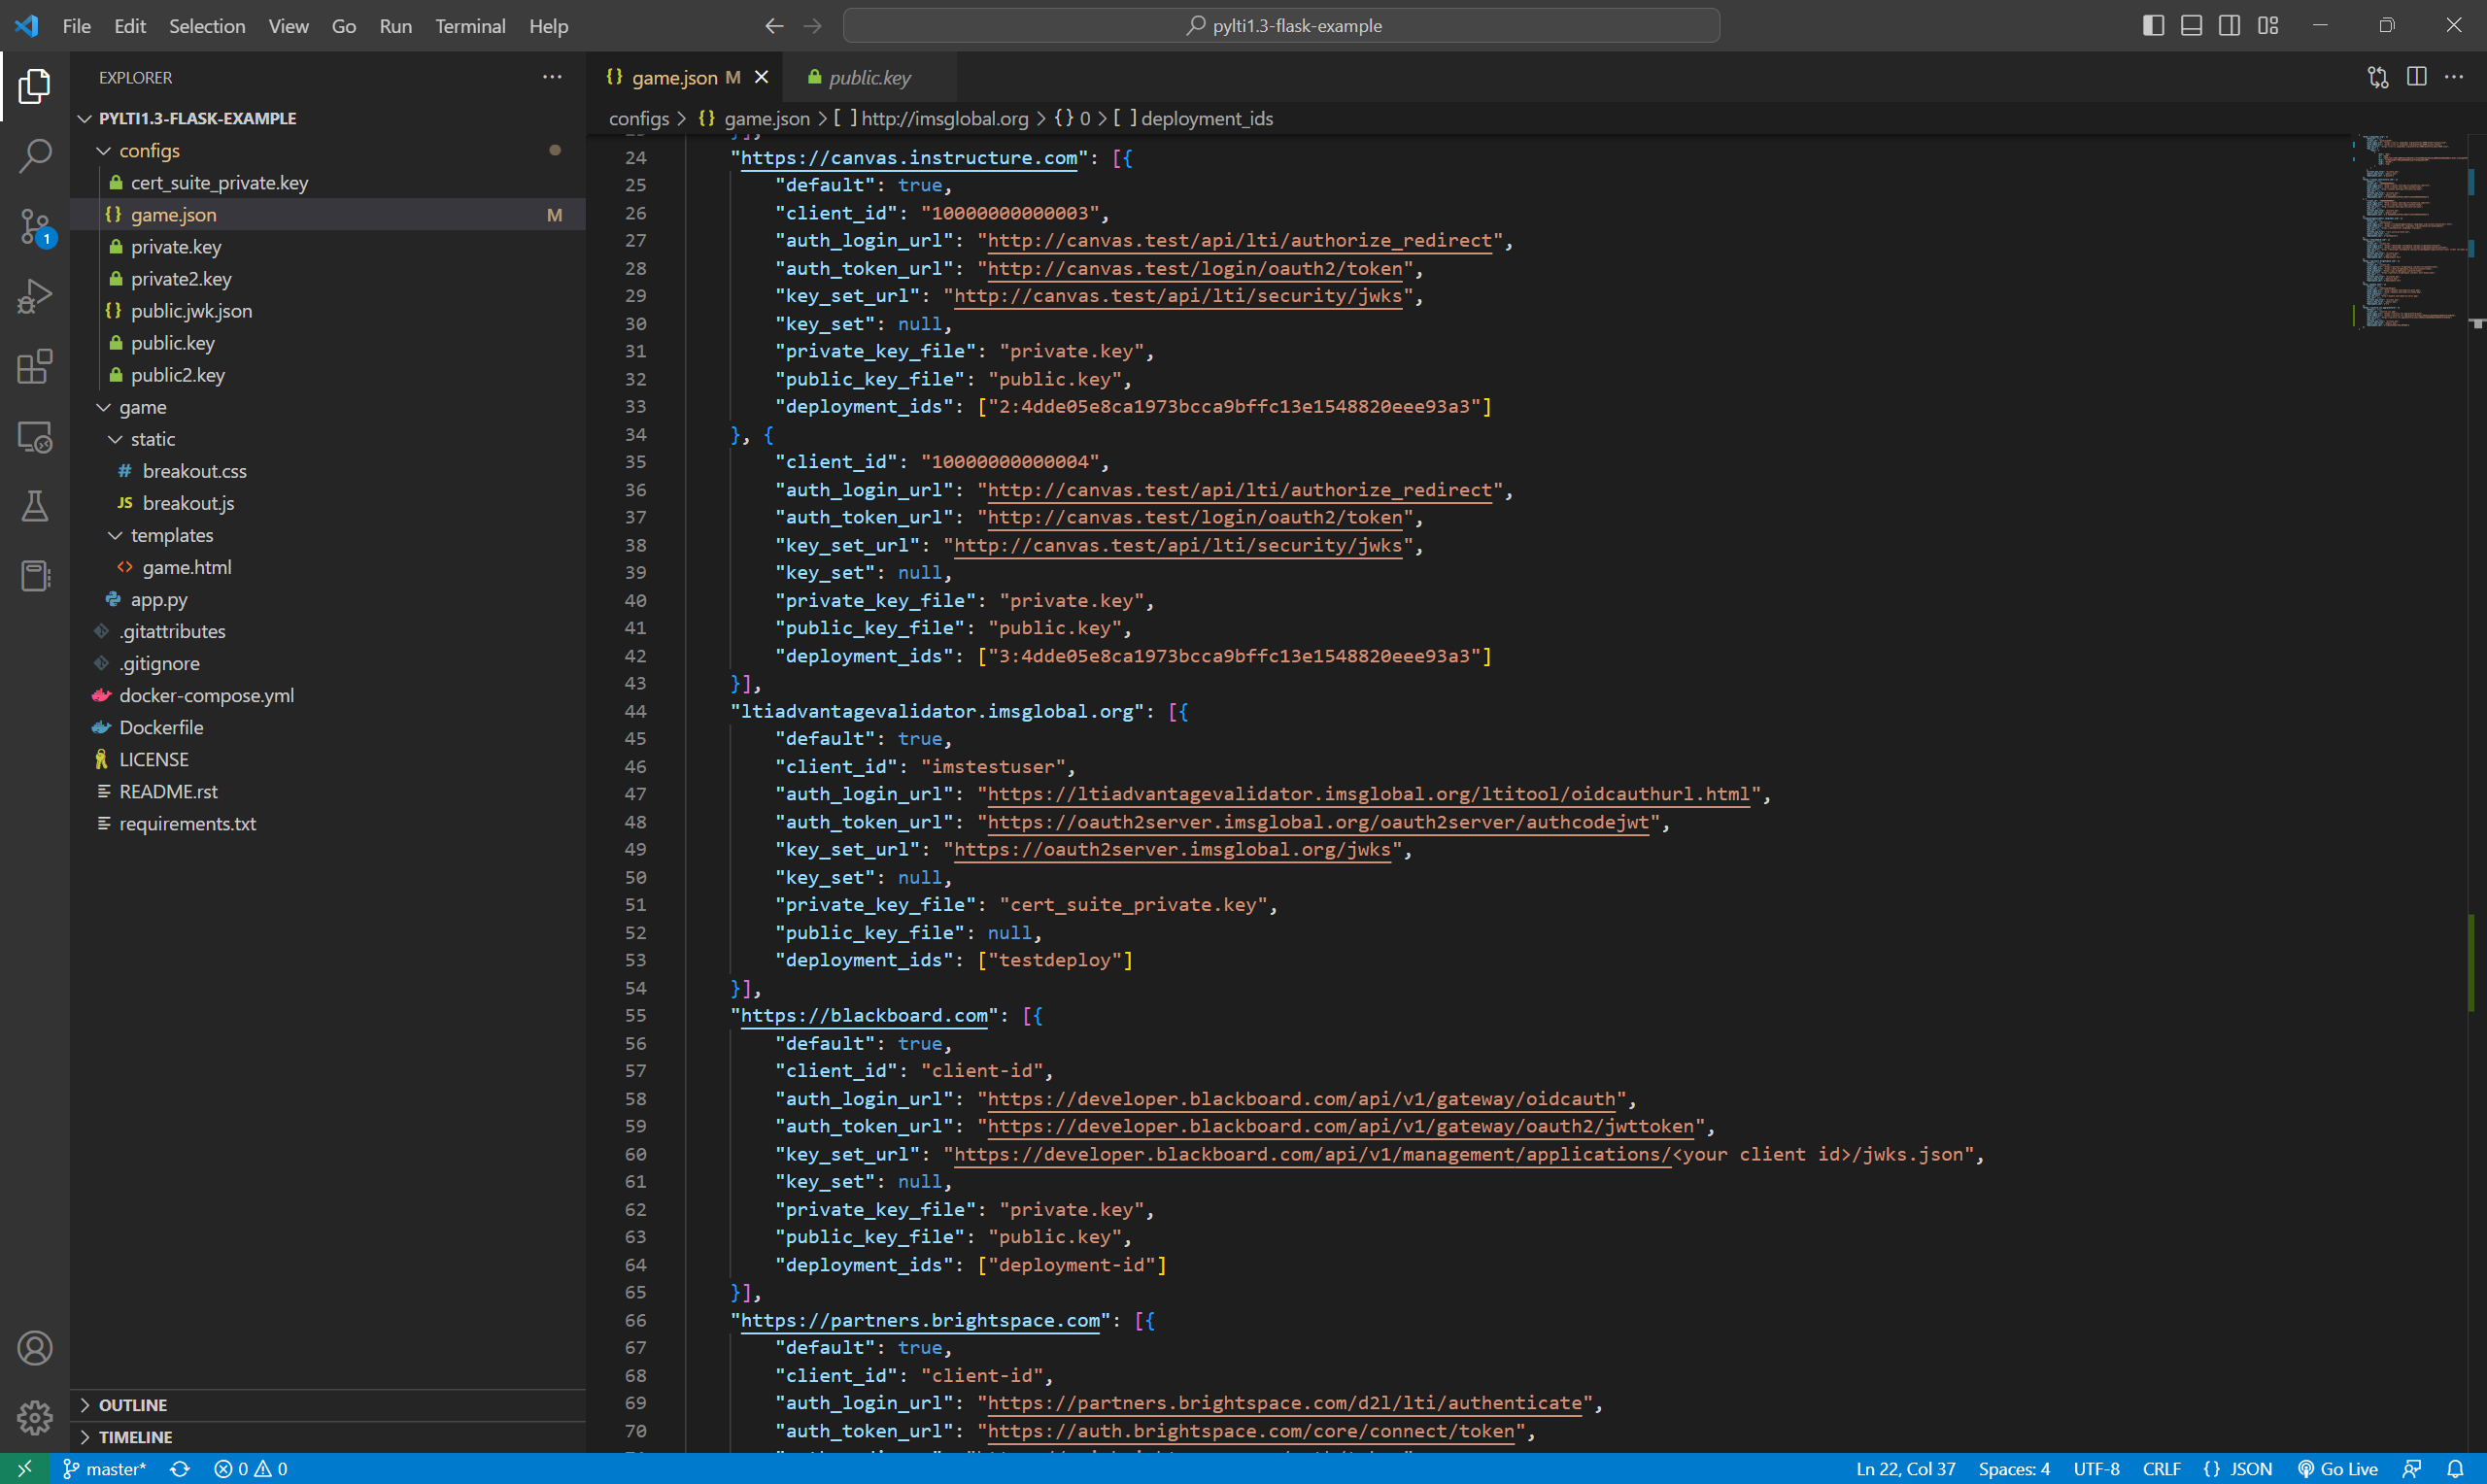
  • Line 76 – ToolConfJsonFile() – receives location of the json config file defined in Step 1.
  • Line 77 – get_launch_data_storage() – retrieves Flask Cache storage.
  • Line 78 – Set up the session through a Flask request.
@app.route('/launch/', methods=['POST'])
def launch():
    tool_conf = ToolConfJsonFile(get_lti_config_path())
    request = FlaskRequest()
    launch_data_storage = get_launch_data_storage()
    message_launch = FlaskMessageLaunch(
        request,
        tool_conf,
        launch_data_storage=launch_data_storage
    )
    message_launch_data = message_launch.get_launch_data()
    #pprint.pprint(message_launch_data)

    tpl_kwargs = {
        'page_title': 'LTI 1.3 Flask App',
        'is_deep_link_launch': message_launch.is_deep_link_launch(),
        'launch_data': message_launch.get_launch_data(),
        'launch_id': message_launch.get_launch_id(),
        'curr_user_name': message_launch_data.get('name', ''),
    }
    return render_template('index.html', **tpl_kwargs)

The launch route above is similar in set up as the login() function and performs an LTI message launch, following successful authorization.

The tpl_kwargs dictionary includes arguments that will be sent to the browser when rendering the Flask template page. Some of these aren’t necessarily used for this tutorial and will be ignored when launching the react quiz app. The unused keys in this project include deep link verification and passing in the current user name.

@app.route('/api/score/<launch_id>/<earned_score>/', methods=['POST'])
def score(launch_id, earned_score):
    tool_conf = ToolConfJsonFile(get_lti_config_path())
    flask_request = FlaskRequest()
    launch_data_storage = get_launch_data_storage()
    message_launch = FlaskMessageLaunch.from_cache(launch_id, flask_request, tool_conf,
                                                           launch_data_storage=launch_data_storage)

    resource_link_id = message_launch.get_launch_data() \
        .get('https://purl.imsglobal.org/spec/lti/claim/resource_link', {}).get('id')

    if not message_launch.has_ags():
        raise Forbidden("Don't have grades!")

    sub = message_launch.get_launch_data().get('sub')
    timestamp = datetime.datetime.utcnow().isoformat() + 'Z'
    earned_score = int(earned_score)

    grades = message_launch.get_ags()
    sc = Grade()
    sc.set_score_given(earned_score) \
        .set_score_maximum(100) \
        .set_timestamp(timestamp) \
        .set_activity_progress('Completed') \
        .set_grading_progress('FullyGraded') \
        .set_user_id(sub)

    sc_line_item = LineItem()
    sc_line_item.set_tag('score') \
        .set_score_maximum(100) \
        .set_label('Score')
    if resource_link_id:
        sc_line_item.set_resource_id(resource_link_id)

    result = grades.put_grade(sc, sc_line_item)

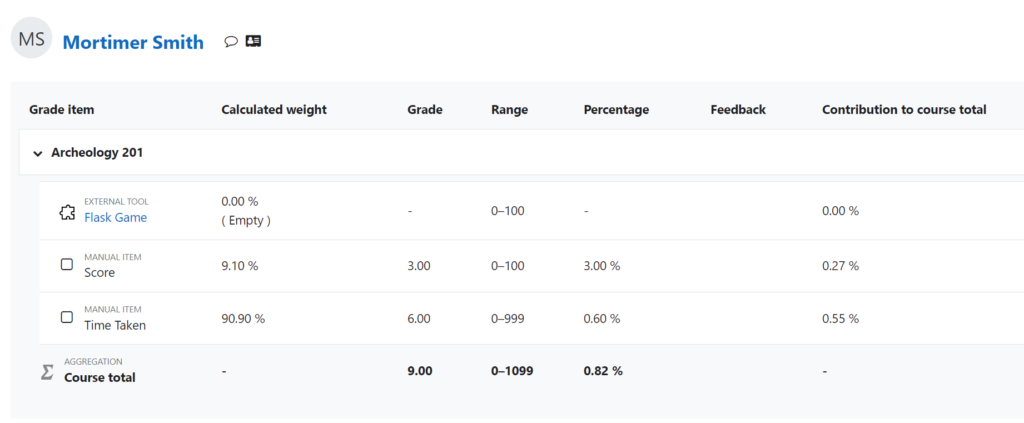
    return jsonify({'success': True, 'result': result.get('body')})

The above will POST the final grade to the platform (LMS) through the LTI Assignment and Grade Service (AGS). We’ll accomplish the following, assuming the user has the proper role and the assignment has been set up in the platform to accept the grade update:

  • A check is performed for AGS availability and will send any errors back to the server log.
  • The score passed to the API endpoint is pushed to the grade center (or gradebook) after setting up the column with the proper configuration and timestamp.

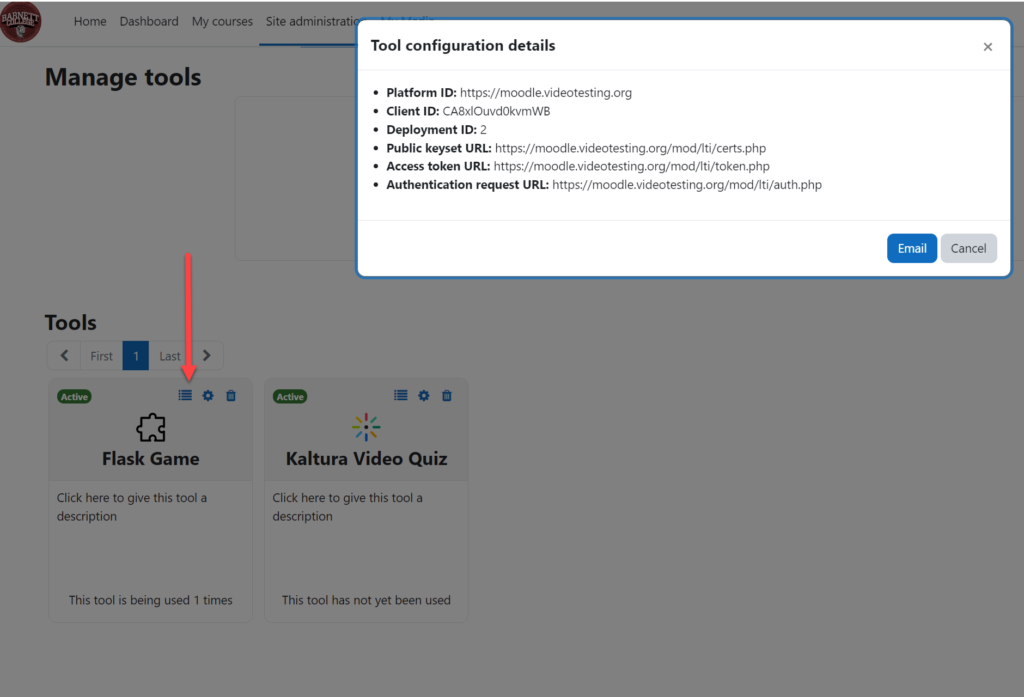
This final route is set up for exposing the public key for our tool:

@app.route('/jwks/', methods=['GET'])
def get_jwks():
    tool_conf = ToolConfJsonFile(get_lti_config_path())
    return jsonify({'keys': tool_conf.get_jwks()})

###############################################################
# End LTI-related routes
###############################################################

In part 3, we will write our (very simple) Quiz front-end using React.js and Tailwind CSS.

Build a Simple LMS-Integrated Quiz App Using Python, React.js, and LTI 1.3

Update: 11/20/2023: Please use the newer PART 1 of this series here:
Build a Simple LMS-Integrated Quiz App Using Python, React.js, and LTI 1.3 – Part 1
The code below references an older Python code that’s not a part of pyLTI1p3.

Update: 5/3/2023: In the process of creating part 2 of this series, I discovered a lot in my research (like, maybe this isn’t the right path for a simple solution) and will be expanding by finding a more viable and maintainable option. Several folks have reached out to me about this article, only to discover that they could use a simpler approach. I began asking questions like: 1) Why use React.js when I could use Flask’s templating engine? Perhaps because React is more common than something like Jinja? 2) Why not use a framework that is built for this purpose, such as LTIjs? More to share on this topic at a future date as I continue to explore the latest frameworks like Vue.js 3 and using Django instead of Flask from the outset. I love it that this is already developing into a tiny community, helping to give this site some direction… and if you feel strongly about the direction I’m taking with this post / series, please click “leave a comment” in the title sidebar.


The project idea is all in the title… Let’s plan out what is involved and what the result might look like.

This is just a high-level overview of a Quiz application built with Python Flask and React.js Javascript library. We’ll have multiple choice as our only option — again just keeping the development effort somewhat simple. The actual implementation will depend on the requirements below and the LMS that we are integrating with BUT I want to make this as agnostic as possible, where the LMS really shouldn’t matter as long as the platform we’re integrating with is LTI1.3/Advantage certified.

Dall-E generated: a surrealist painting of a cyberpunk, sitting at a desk in a desert at night

1. Flask Backend

  • Create a Flask application that implements LTI 1.3 by using an LTI library. I think we have a good idea of what that will be: PyLTI1p3.
  • Create a RESTful API for the quiz application that allows React frontend to retrieve questions and submit answers.
  • The backend should also be able to store the scores of the students and their grading status. Perhaps we’ll just use SQLite, although I believe this isn’t the best choice. The intention here will be to migrate to PostgreSQL but SQLite is good enough for establishing the initial database schema.

2. React Front-end

  • Create a React application that fetches questions from the Flask backend and displays them to the user.
  • Allow users to submit answers to the questions and provide feedback on their responses.
  • The frontend should also be able to retrieve the scores and grading status of the students.
  • If this were Django, and since it’s not a complex build, I would likely skip this part and implement the front-end part of the stack through it’s native templating engine. My favorite options are Vue.js and React.js because of their flexibility and they are fine to use with Django.

3. Integration with the LMS

  • Implement the LTI 1.3 protocol in the Flask backend to communicate with the LMS.
  • Pass the scores of the students back to the LMS and create a gradebook column in the LMS.
  • Post the scores along with grading status to the LMS.

Preview of Step 2 (which I will post soon) — Using PyLTI1p3 with Flask might look something like this. Let’s explore further in Part 2, where we’ll refine this and test it out.

from flask import Flask, request
from pylti1p3.flask import lti

app = Flask(__name__)

@app.route('/api/questions', methods=['GET'])
@lti(request='launch', role='instructor')
def get_questions():
    # Retrieve questions from the database
    # ...

    return json.dumps(questions)

@app.route('/api/scores', methods=['POST'])
@lti(request='launch', role='student')
def submit_score():
    score = request.form['score']
    # Store the score in the database
    # ...

    # Pass the score back to the LMS and create a gradebook column
    request.lti_outcome_service().post_replace_result(score)
    return 'Score submitted successfully'

if __name__ == '__main__':
    app.run()

This code uses the @lti decorator from pylti1p3 to implement the LTI 1.3 protocol and check if the request is valid and if the user has the correct role.

The get_questions function retrieves the questions from the database and returns them to the frontend.

The submit_score function stores the score in the database and passes it back to the LMS using the post_replace_result method from the LTI outcome service.

This is just sample code and we will need to make many modifications in order to fit the specific requirements of our project.

Thank you and have a great day!

LTI Moodle Integration using pyLTI 1.3 (Python/Flask Game Example)

Dall-E generated: “sunny surrealist painting of a video game integrated into a python’s brain”

Definitions and References for this post

  • IMS Global / 1EdTech – An excellent organization that continues to put forth great standards and frameworks for EdTech integrations.
  • LTI = Learning Tools Interoperability: A set of standards and services, primarily used for the proper integration of platforms (Learning Management Systems) and third-party tool providers, typically servicing Higher Ed and K12.
  • dmitry-viskov’s pylti1.3 Github repo – a Python implementation of the 1EdTech PHP tool. We’re going to use the example game provided by the developer.
  • URLs used for the local tool configuration. Note that you can configure these how you want, so they could vary. The default URLs are:
    • OIDC Login URL: http://127.0.0.1:9001/login/
    • LTI Launch URL: http://127.0.0.1:9001/launch/
    • JWKS URL: http://127.0.0.1:9001/jwks/ (if you choose to implement a public keyset URL).
  • Moodle LTI 1.3 Support page: https://docs.moodle.org/dev/LTI_1.3_support
  • Moodle 4 Doc for Publishing an LTI Tool and an excellent primer for a better understanding of LTI!

This post builds off of my previous post where I used the saLTIre platform emulator to test out the example breakout game using the pyLTI1.3 Flask test implementation. The game does some score pass-back and all seems to work well with Moodle. I’ll walk through all the steps!

My Test Environment

When I was working for Kaltura as a Solutions Engineer, I set up this Moodle 4 instance for demos. This particular subdomain falls within a shared hosting environment in my reseller Hostgator account, so there were some initial issues with being able to write back to Moodle via a POST method (from the locally hosted Flask LTI Game). Their support was able to make some Apache Mod Security exceptions for me without screwing with needed security… and we got things going. For those having to do their own troubleshooting in this matter — and if you’re using a cheap-o shared / test environment like me, here’s a snippet from the chat transcript and what Hostgator support had to do for me:

[*] URLS Affected: /mod/lti/services.php/4/lineitems
[*] Description: Atomicorp.com WAF Rules: Request content type is not allowed by policy
I am trying to check and whitelist the Mod Security from my end
[*] Whitelisting rule 391213 for moodle.videotesting.org
[*] Testing apache configuration…
[*] Configuration good! Restarting Apache…DONE!

More about tuning Mod_Security for your needs can be found here.

Step 1 – Local App Configuration

As far as the local configuration, I updated the existing Moodle configuration example in /configs/game.json with my Moodle parameters:

  • You’ll find the needed URLs in your Moodle integration setup (in the next step).
  • The client_id and deployment_ids parameters needed here are generated by Moodle once the configuration is saved.
  • As you can see, I’m still using the same private.key file from my previous post about implementing with saLTIre. You’ll copy the contents of that file for use in the next step.

Step 2 – Moodle 4 configuration

  • I implemented the LTI globally (not at the course level): Site Administration -> Plug-ins -> Activity Modules ->External Tool -> Manage Tools -> Configure a Tool Manually
  • Tool URL: We’re using the localhost address and port configured in the Python Flask game.
  • LTI Version: LTI 1.3
  • Client ID: Retrieved once saved.
  • Public key type: RSA key. If you want to give the keyset URL option a try, you’ll use the JWKS URL from the resource section and the top of my post.
  • Public Key: Paste in from the public.key file in Step 1
  • Login URL and Redirection URI: Use the localhost’s configuration.
  • Services and Privacy settings can be configured based on institutional preferences but we want to make sure that grade sync / column management and student info passback is enabled if you want to see the student name and get the full exchange of information with the LTI game.
  • Deep Linking options should be enabled.
  • Under Miscellaneous, I made sure that my tool appeared in all courses for my entire site, selecting Site Hostname.
Click to Enlarge
Click to enlarge
Click to Enlarge

Once the changes are saved, you can grab what you need by going back to Site Administration -> Plug-ins -> Activity Modules ->External Tool -> Manage Tools and selecting the “View Configuration Details” button on the card for the Flask Game tool that was just created. From there you can grab the Client ID, URLs, and Deployment ID info needed by the too configuration in Step 1.

After all has been saved. Let’s test with a student in a course!

As the instructor, if I have a look at the gradebook in my course, I can see Morty’s scores. Granted, I probably need to change the range based on the difficulty of the game, etc.

Ad-hoc platforms for LTI tool integrations testing

Definitions and References for this post

The search for up-to-date tool provider examples written in Python

In attempting to learn more about how I could leverage Python Flask or Django in developing a new LTI tool provider, I discovered some excellent (and up-to-date, as of this post) examples that I could use to build something locally for testing, and that I’m able to run fairly easily. This search wasn’t super-easy since there isn’t a lot that takes into account the newer standards with LTI 1.3 / Advantage, and isn’t dated like MITs pyLTI with support only for LTI 1.1 and/or 2.0 standards.

Dall-E generated: “oil painting of three dimensional bridge connecting two computers with a night sky background”

Finding a platform for testing an LTI

With the newer GitHub example project, I was able to build a local development environment, start up a Flask server, and serve up a simple tool that could be tested. BUT, I need a platform to do the proper testing! Launching endpoints will just error out until I have the context in place, within a course, in an LMS… or at least a simulated version of an LMS. That’s where saLTIre came in handy for this purpose. Let’s a take a look at how to properly set up this Flask example by making some changes to the tool provider’s configuration in order to get it to work properly with saLTIre platform emulator.

Setting up the Flask app for use with saLTIre

Step 1 – Set up your development environment and clone the repo

If you know how to deploy a Docker container to your desktop, that’s probably the easier method, outlined here: https://github.com/dmitry-viskov/pylti1.3-flask-example. I personally prefer getting things set up locally in a Python virtual environment, so that’s the option I used.

$ cd ~/dev
$ git clone git@github.com:dmitry-viskov/pylti1.3-flask-example.git
$ python -m venv ~/dev/python_envs/flask_lti13
$ source ~/dev/python_envs/flask_lti13/Scripts/activate
$ cd ~/dev/plylti1.3-flask-example
$ pip install -r requirements.txt
$ cd game
$ python app.py

The above is copied from the bottom of the GitHub repo’s README for this project, with a couple of minor changes for my personal environment. I’m using Git-Bash for Windows for this one and I like to store all my Python virtual environments in one directory, embedded in my development environment. I already have a dev directory in my home directory that contains all my various tests and projects.

Really, it’s up to you!

Please refer to Real Python’s primer for doing this properly in your choice of virtual environment.

Running python app.py will run the server… and if there are no errors to address, go ahead and shut it down before completing the next steps (Ctrl+C).

Step 2 – Add a new configuration that works with saLTIre

One thing you’ll notice with this project is that it includes several configurations in /configs/game.json for major Learning Management Systems like Canvas, Blackboard, Moodle, and D2L. It also includes additional client configurations for 1EdTech’s platform emulator / reference implementation and validator.

Since there wasn’t one for saLTIre, I added the following to the bottom of the file. It looks something like this:

"https://saltire.lti.app/platform": [{
        "default": true,
        "client_id": "saltire.lti.app",
        "auth_login_url": "https://saltire.lti.app/platform/auth",
        "auth_token_url": "https://saltire.lti.app/platform/token/1026212c6ba048ba418392ef4c51013d",
        "key_set_url": "https://saltire.lti.app/platform/jwks/1026212c6ba048ba418392ef4c51013d",
        "key_set": null,
        "private_key_file": "private.key",
        "public_key_file": "public.key",
        "deployment_ids": ["cLWwj9cbmkSrCNsckEFBmA"]
}]

Where did I get most of these parameters from? I’ll show you in the next step. We’ll get them from the saLTIre platform emulator. Go ahead and save the new platform config to the game.json file. You can adjust anything you need in here once the next steps are complete.

Setting Up saLTIre

Step 1 – Create an account

Go to https://saltire.lti.app/platform and create an account. This may not be necessary but it allows you to save some of your tool-level configurations for subsequent use. You must have a Google account in order to sign in.

Click the Options dropdown -> Sign in

Step 2 – Configure the Security Model

Select Security Model and configure the following:

  • LTI version -> 1.3
  • Message URL -> http://127.0.0.1:9001/launch/
    • Use the tool’s launch URL for this. If you followed the Flask app setup above (along with the github readme, you should be working with localhost and TCP port 9001.
  • Ensure that the signature method is set to -> RS256 (JWT Authorization).

Step 3 – Enter the LTI Tool Details

Whilst you are still on the Security Model page:

  • Initiate login URL -> http://127.0.0.1:9001/login/
  • Redirection URI(s) -> http://127.0.0.1:9001/launch/
  • Public key -> This (full text) needs to be copied from the key included with your Flask tool implementation. You can grab that from here (assuming your paths are like mine): ~/dev/plylti1.3-flask-example/configs/public.key. Essentially, the public key that you’ll want is inside your projects root directory -> configs, where we also found the game.json file.

After this is complete, you can register the tool, make it public and save your config. This is purely up to you but is great for future reference.

Click Save at the top of the screen, next to the saLTIre logo.

Step 4 – Confirm/configure platform details in the tool configuration

Yes, you are still on the Security Model page…

You’ll want to ensure that the /config/game.json contains the following platform details for the saltire platform configuration.

  • Client ID -> client_id
  • Deployment ID -> deployment_ids
  • Application Request URL -> auth_login_url
  • Access Token service URL -> auth_token_url
  • Public keyset URL -> key_set_url

Save the changes to the game.json file.

Step 5 – Configure the Message Type in saLTIre

Select the Message from the left navigation. At this point you will have different results based on the type of app you are using. With the game that we’re trying to launch, either deep linking or resource link requests will work, but each with different results. You will want to use the Deep Linking request in order to complete a full test and get back a response.

In this example, I’m selecting LtiDeepLinkingRequest

Once Deep Linking is selected, you’ll be presented with more options. Feel free to play around with this once things are up and running to gauge what the various results will be based on certain selections.

  • Beyond the defaults, at least LtiResourceLink needs to be added to the list of accepted types.
  • Don’t forget to click SAVE at the top of the page.

Launch the App locally and connect!

Launch the app.py in your <app root>/game directory. Don’t forget to enable the virtual environment. Should look something like this (I’m using git-bash on Windows):

source ~/dev/python_envs/flask_lti13/Scripts/activate
cd ~/dev/flask_projects/pylti1.3-flask-example/game
python app.py

If all is well and without errors, try launching into the LTI tool from the platform by clicking on Connect at the top right corner of the screen. You can also select some options from the Connect drop-down for various launch conditions. One excellent way to debug the connection payload is to use the Preview connection option — one of my favorite items.

Once Launched the tool should present a difficulty selection…

… and with the deep linking option in saLTIre, you won’t get an opportunity to play the game but you’ll return to the platform with a whole lot of info and a verification status. You should see a green Passed if all went well.

You are able to play the game if you change the message type from LtiDeepLinkingRequest to LtiResourceLinkRequest. You can also see the name of the student in the game.

A score is likely being passed back… but that’s where I wasn’t able to make it ALL happen inside of saLTIre. I can certainly get us to an end, but would love to see this workflow work properly.

Launch and Authenticate -> Select Difficulty -> Play game to completion and close -> Score is passed back to the “gradebook” and a column created.

I’m hoping it’s just something I missed in the config but would be happy to hear what you think and if anyone out there can help me craft a solution. This is a great example of a working app inside of an LMS platform with score pass-back as a potential option.

Thanks! I’m looking forward to your feedback. Follow-ups and upcoming posts will include:

  • An explanation of what all this is and an exploration of authentication in LTI 1.3.
  • Trying out the Django version of this example in saLTIre.
  • More closely checking out the tool inside the 1EdTech platform emulator. I attempted this option prior to using saLTIre and was disappointed in the results and received several errors. Perhaps saLTIre is just forgiving? Not sure.
  • Building an LTI app using Python and potentially exploring lowcode / nocode tools for implementing an LTI. What are the security challenges(?), etc.

Welcome to my site!

Dall-E generated: “oil painting astronaut walking on unknown planet with alien face barely visible”

Greetings, everyone! Greetings, EdTech Developers, Vendors, Admins, Staff, Instructors, and Students.

I’m super-excited to be starting one of many new endeavors — a blog about development for Educational Technology and Integrations. Here you will find a resource for everything Learning Tools Interoperability. I’ve worked in the EdTech industry for many years — for vendors and institutions — in a variety of roles; developer, admin, engineer.

I’ve learned along the way that LTI can be a great thing for institutions (colleges, universities, and corporations) wanting to integrate third party solutions into their LMS(s) that do a thing better than the core LMS itself, perhaps acting as a complementary tool if built to the right specifications. Tool providers can be simple (attendance tool) or complex (portfolio application integrations) and some of those solutions can adhere to LTI standards very well, but I would say that many do it very poorly — perhaps quick development of an integration helps to provide another checkbox item for a marketing campaign, if you will…?

“We Integrate with ALL the major LMSs”… followed by a graphic with dated logos that looks something like this”:

We’re tired of used to seeing this LMS rundown. Right? 🙂

Anyway, the goals of this site at the outset:

  • Provide a place for LMS / EdTech Admins and Tool Providers to connect
  • LTI 1.3 / Advantage standards are relatively new to developers. We need a place to discuss ideas and workflows further, beyond the awesome documentation provided on the IMS Global / 1EdTech site.
  • Provide a place for tutorials and simplification for implementing LTI using a variety of different development platforms.
  • Not explaining LTI! Don’t expect this site to explain what LTI is or write documentation around the standards. You’ll have to go to the source for that: https://www.imsglobal.org/activity/learning-tools-interoperability
  • Having a look at tool provider documentation and complementing or helping to make improvements.

Just getting started! More to come…