Definitions and References for this post
- IMS Global / 1EdTech – An excellent organization that continues to put forth great standards and frameworks for EdTech integrations.
- LTI = Learning Tools Interoperability: A set of standards and services, primarily used for the proper integration of platforms (Learning Management Systems) and third-party tool providers, typically servicing Higher Ed and K12.
- dmitry-viskov’s pylti1.3 Github repo – a Python implementation of the 1EdTech PHP tool. We’re going to use the example game provided by the developer.
- URLs used for the local tool configuration. Note that you can configure these how you want, so they could vary. The default URLs are:
- OIDC Login URL: http://127.0.0.1:9001/login/
- LTI Launch URL: http://127.0.0.1:9001/launch/
- JWKS URL: http://127.0.0.1:9001/jwks/ (if you choose to implement a public keyset URL).
- Moodle LTI 1.3 Support page: https://docs.moodle.org/dev/LTI_1.3_support
- Moodle 4 Doc for Publishing an LTI Tool and an excellent primer for a better understanding of LTI!
This post builds off of my previous post where I used the saLTIre platform emulator to test out the example breakout game using the pyLTI1.3 Flask test implementation. The game does some score pass-back and all seems to work well with Moodle. I’ll walk through all the steps!
My Test Environment
When I was working for Kaltura as a Solutions Engineer, I set up this Moodle 4 instance for demos. This particular subdomain falls within a shared hosting environment in my reseller Hostgator account, so there were some initial issues with being able to write back to Moodle via a POST method (from the locally hosted Flask LTI Game). Their support was able to make some Apache Mod Security exceptions for me without screwing with needed security… and we got things going. For those having to do their own troubleshooting in this matter — and if you’re using a cheap-o shared / test environment like me, here’s a snippet from the chat transcript and what Hostgator support had to do for me:
[*] URLS Affected: /mod/lti/services.php/4/lineitems
[*] Description: Atomicorp.com WAF Rules: Request content type is not allowed by policy
I am trying to check and whitelist the Mod Security from my end
[*] Whitelisting rule 391213 for moodle.videotesting.org
[*] Testing apache configuration…
[*] Configuration good! Restarting Apache…DONE!
More about tuning Mod_Security for your needs can be found here.
Step 1 – Local App Configuration
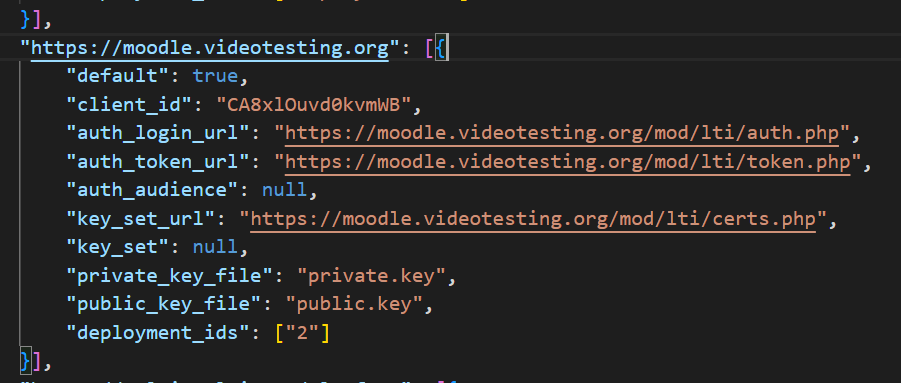
As far as the local configuration, I updated the existing Moodle configuration example in /configs/game.json with my Moodle parameters:
- You’ll find the needed URLs in your Moodle integration setup (in the next step).
- The client_id and deployment_ids parameters needed here are generated by Moodle once the configuration is saved.
- As you can see, I’m still using the same private.key file from my previous post about implementing with saLTIre. You’ll copy the contents of that file for use in the next step.
Step 2 – Moodle 4 configuration
- I implemented the LTI globally (not at the course level):
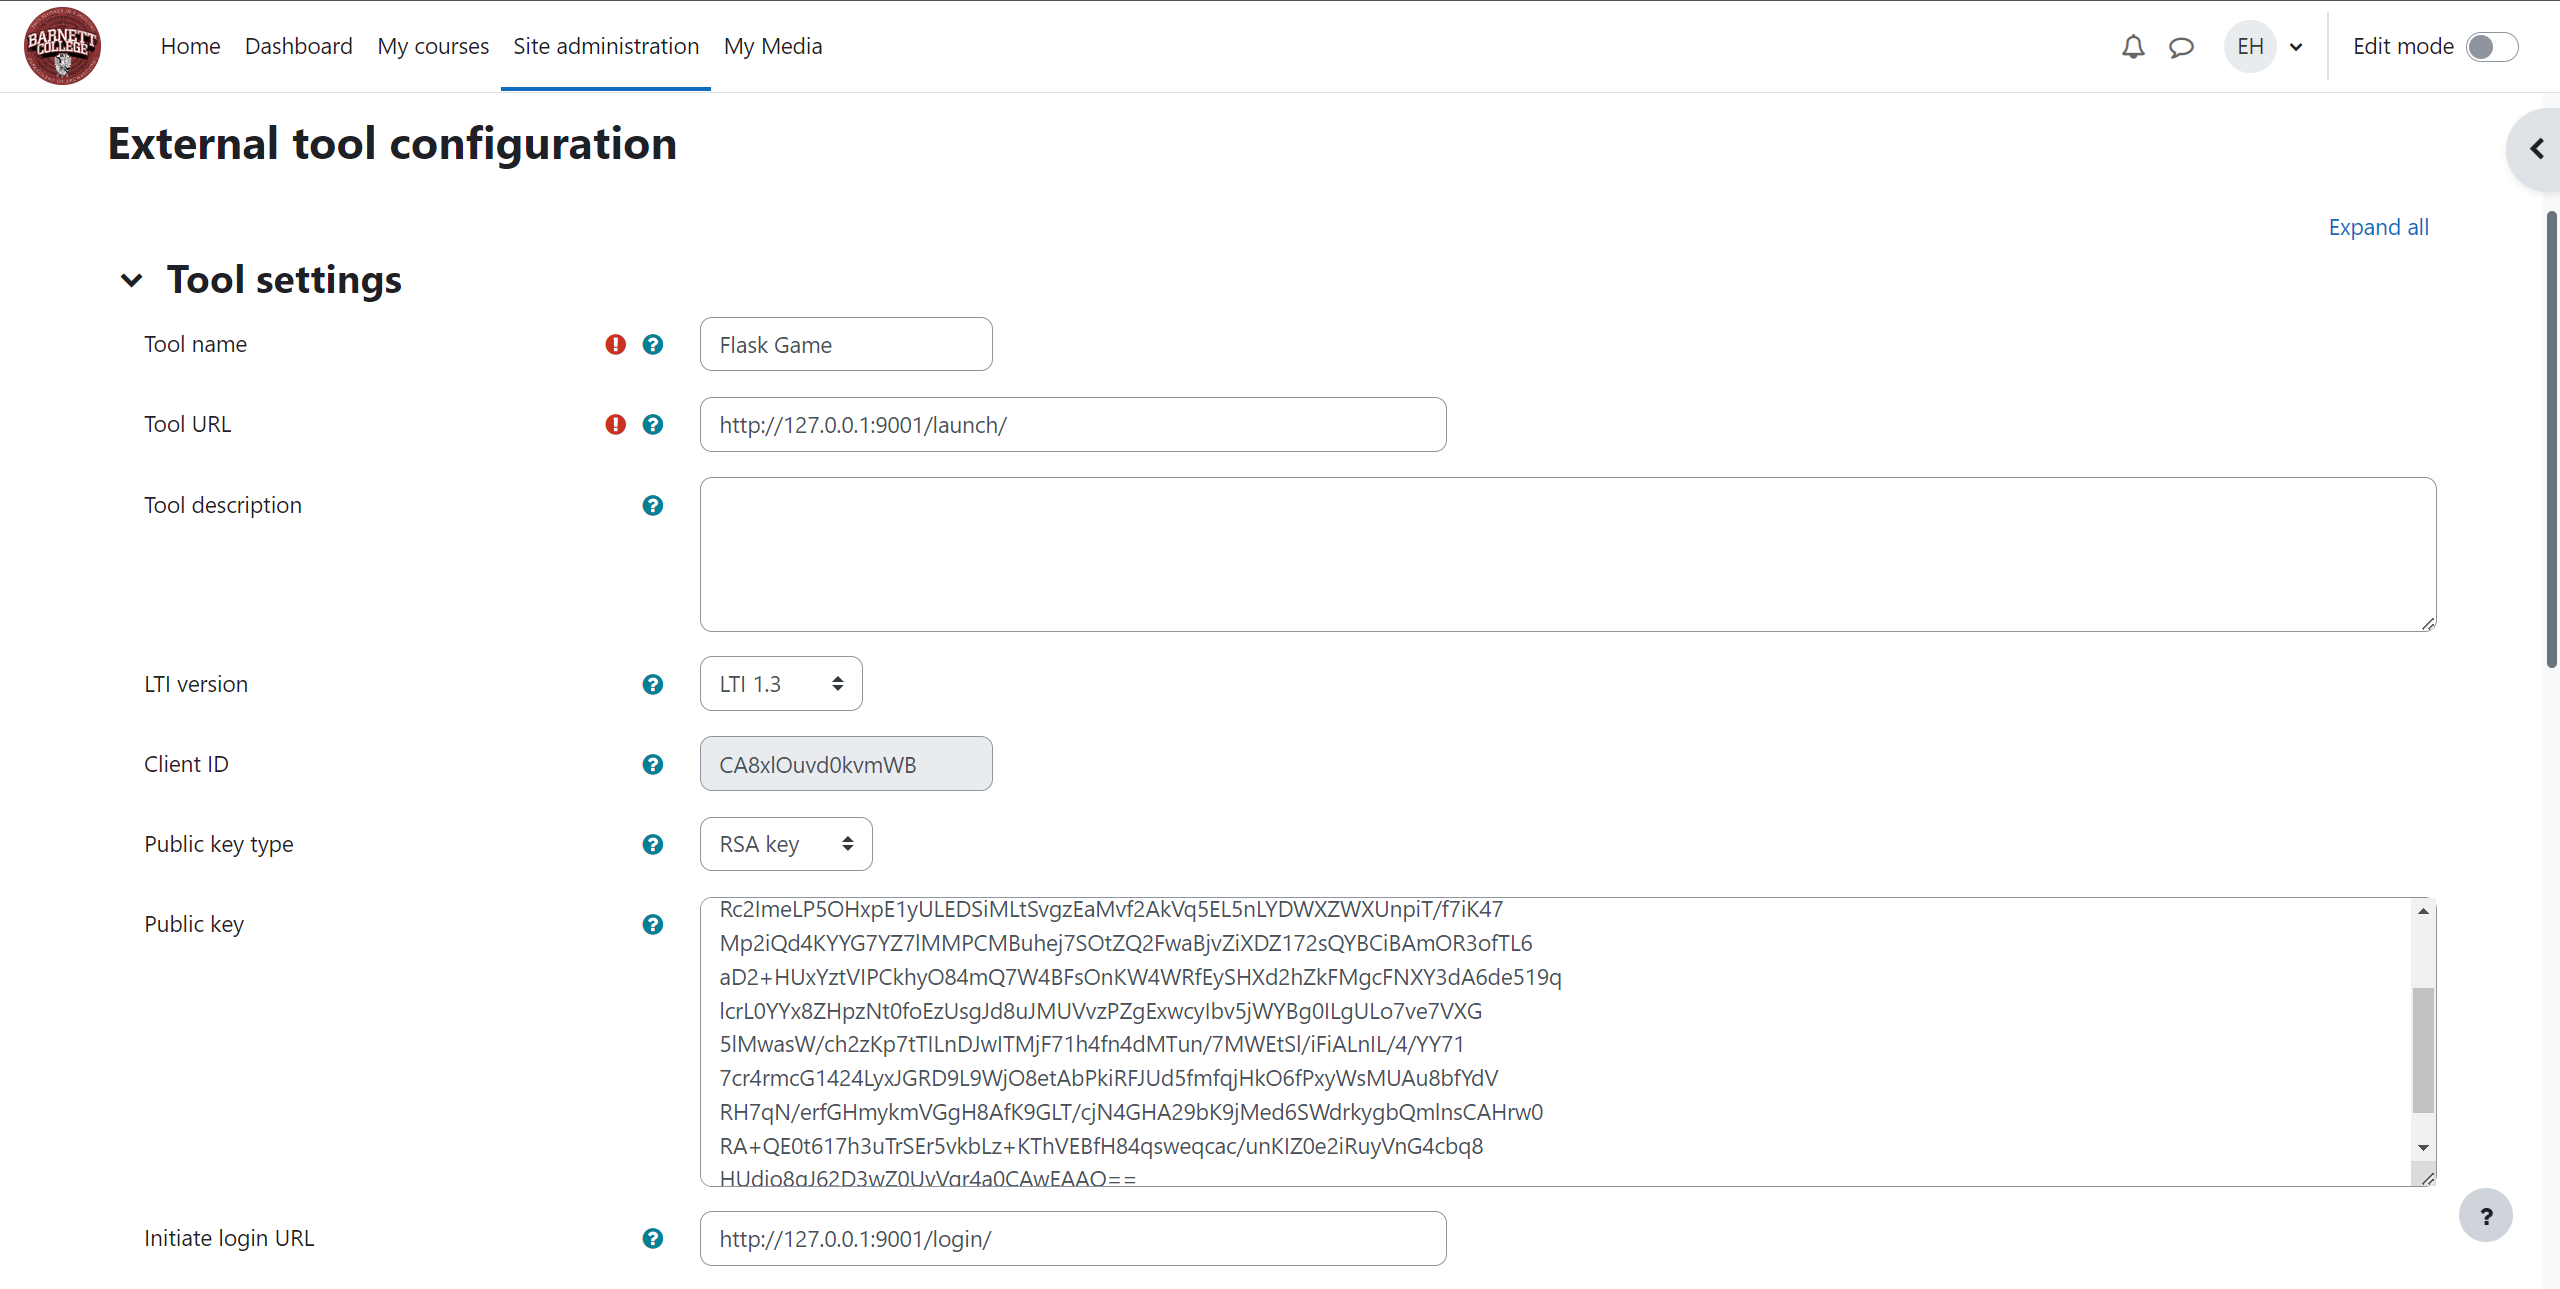
Site Administration -> Plug-ins -> Activity Modules ->External Tool -> Manage Tools -> Configure a Tool Manually - Tool URL: We’re using the localhost address and port configured in the Python Flask game.
- LTI Version: LTI 1.3
- Client ID: Retrieved once saved.
- Public key type: RSA key. If you want to give the keyset URL option a try, you’ll use the JWKS URL from the resource section and the top of my post.
- Public Key: Paste in from the public.key file in Step 1
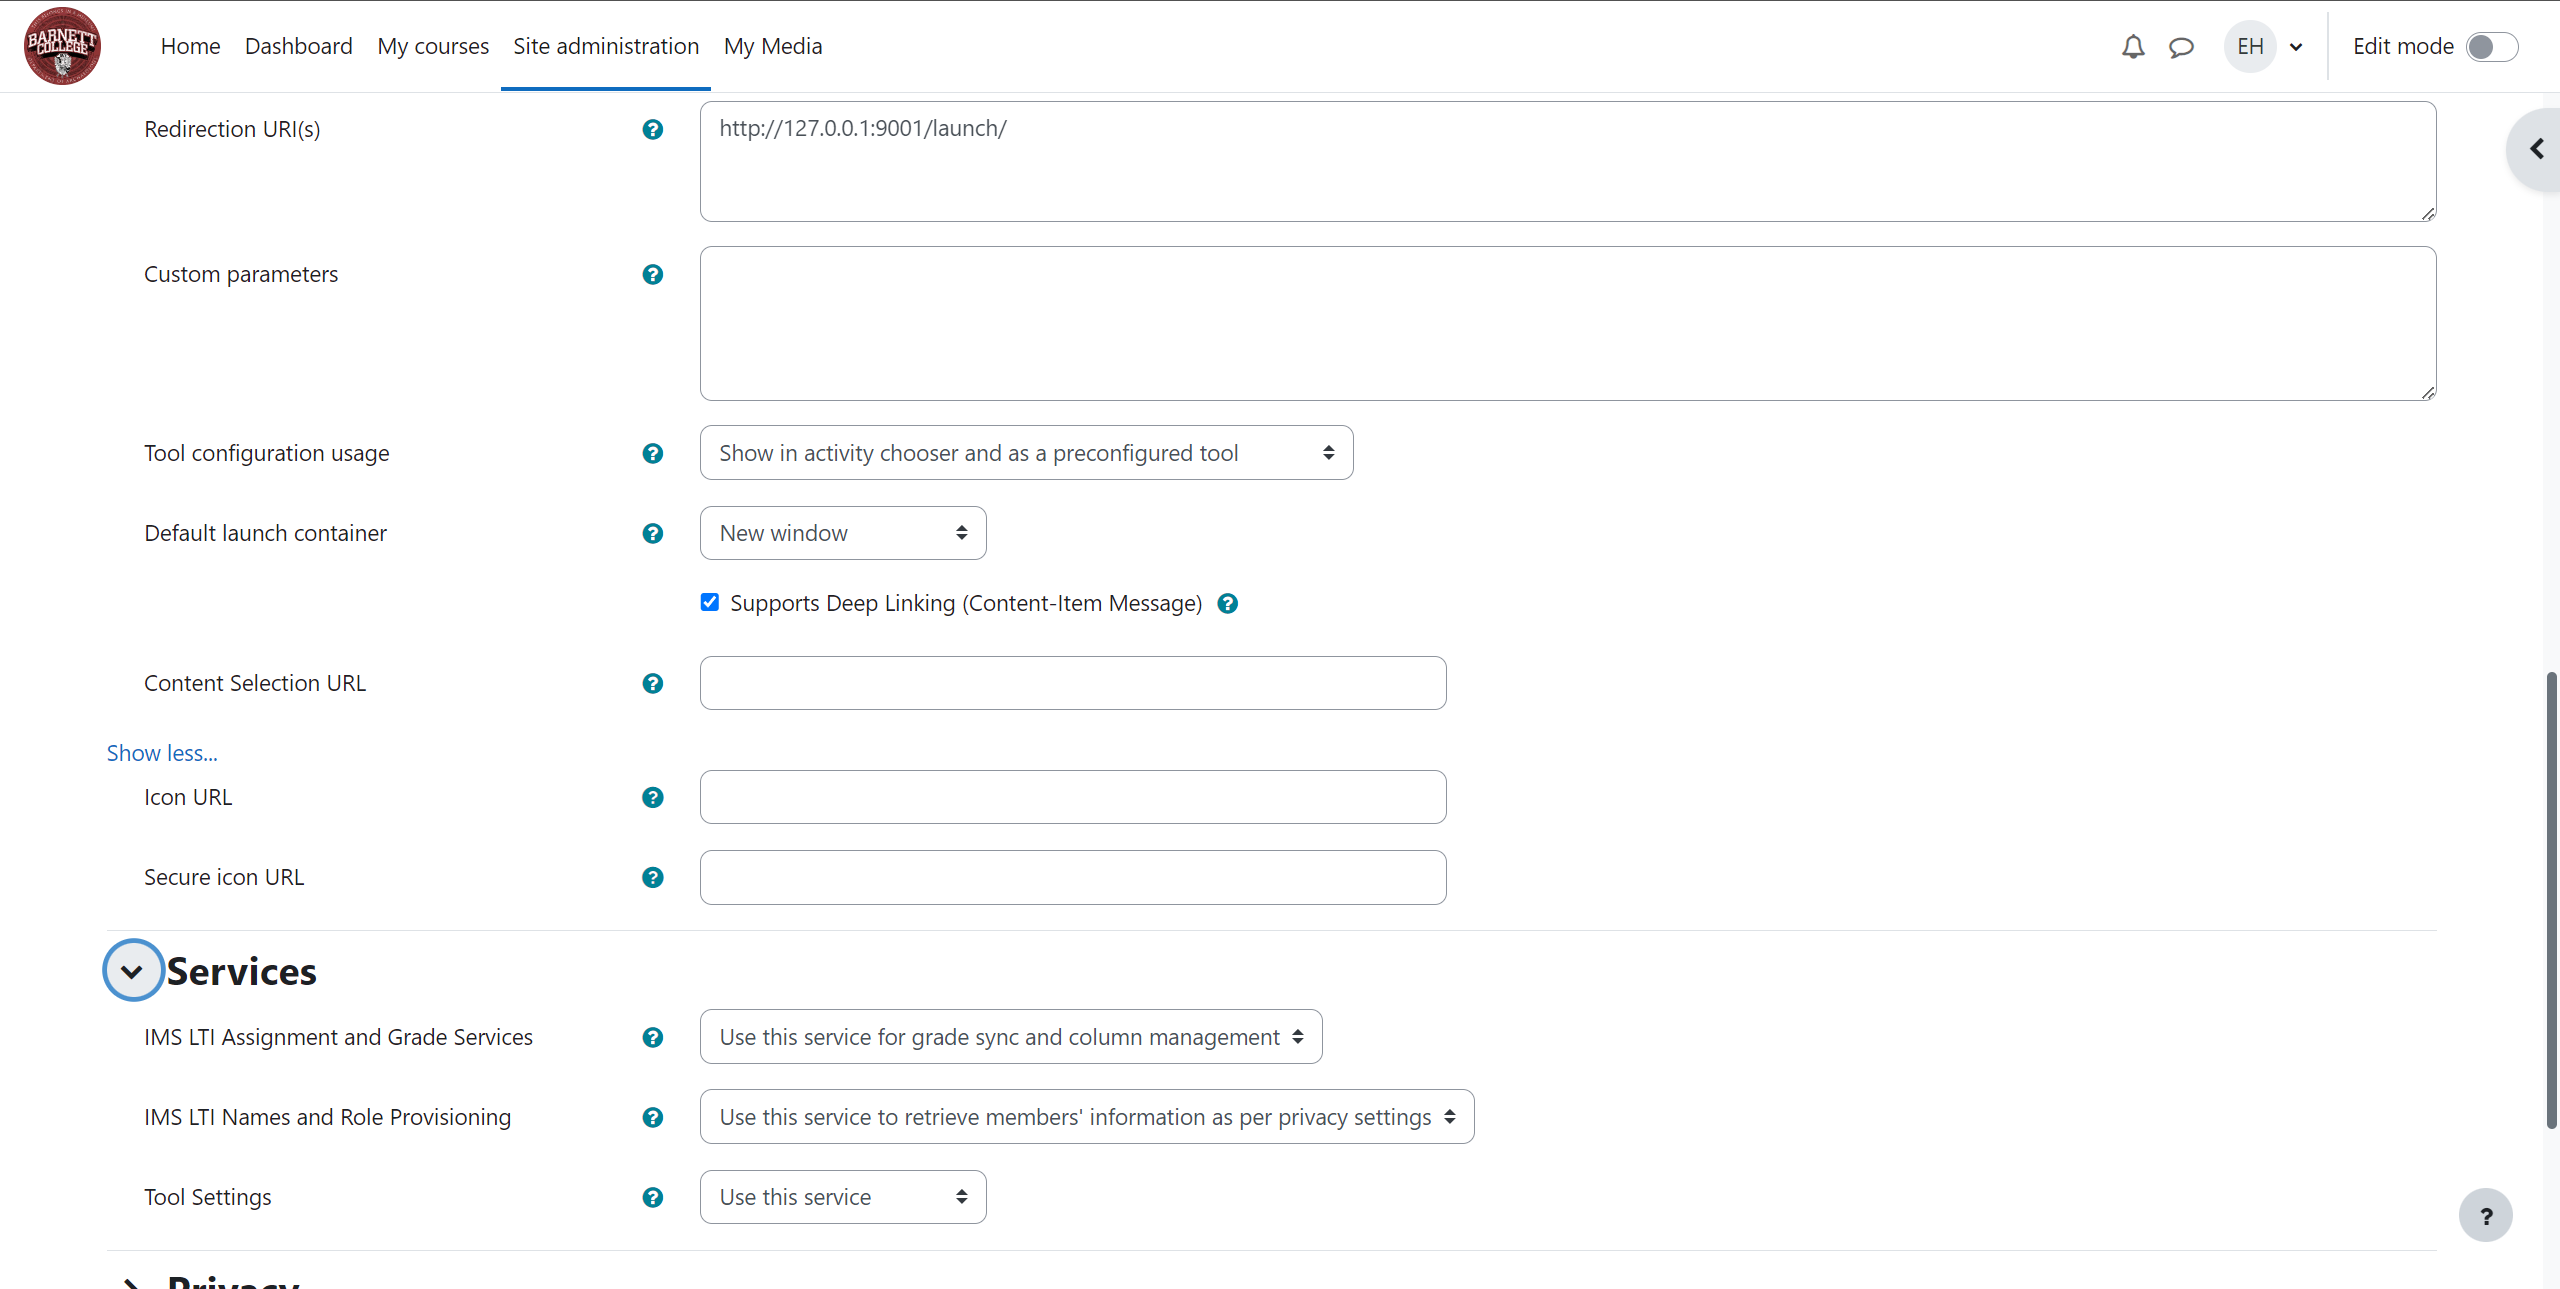
- Login URL and Redirection URI: Use the localhost’s configuration.
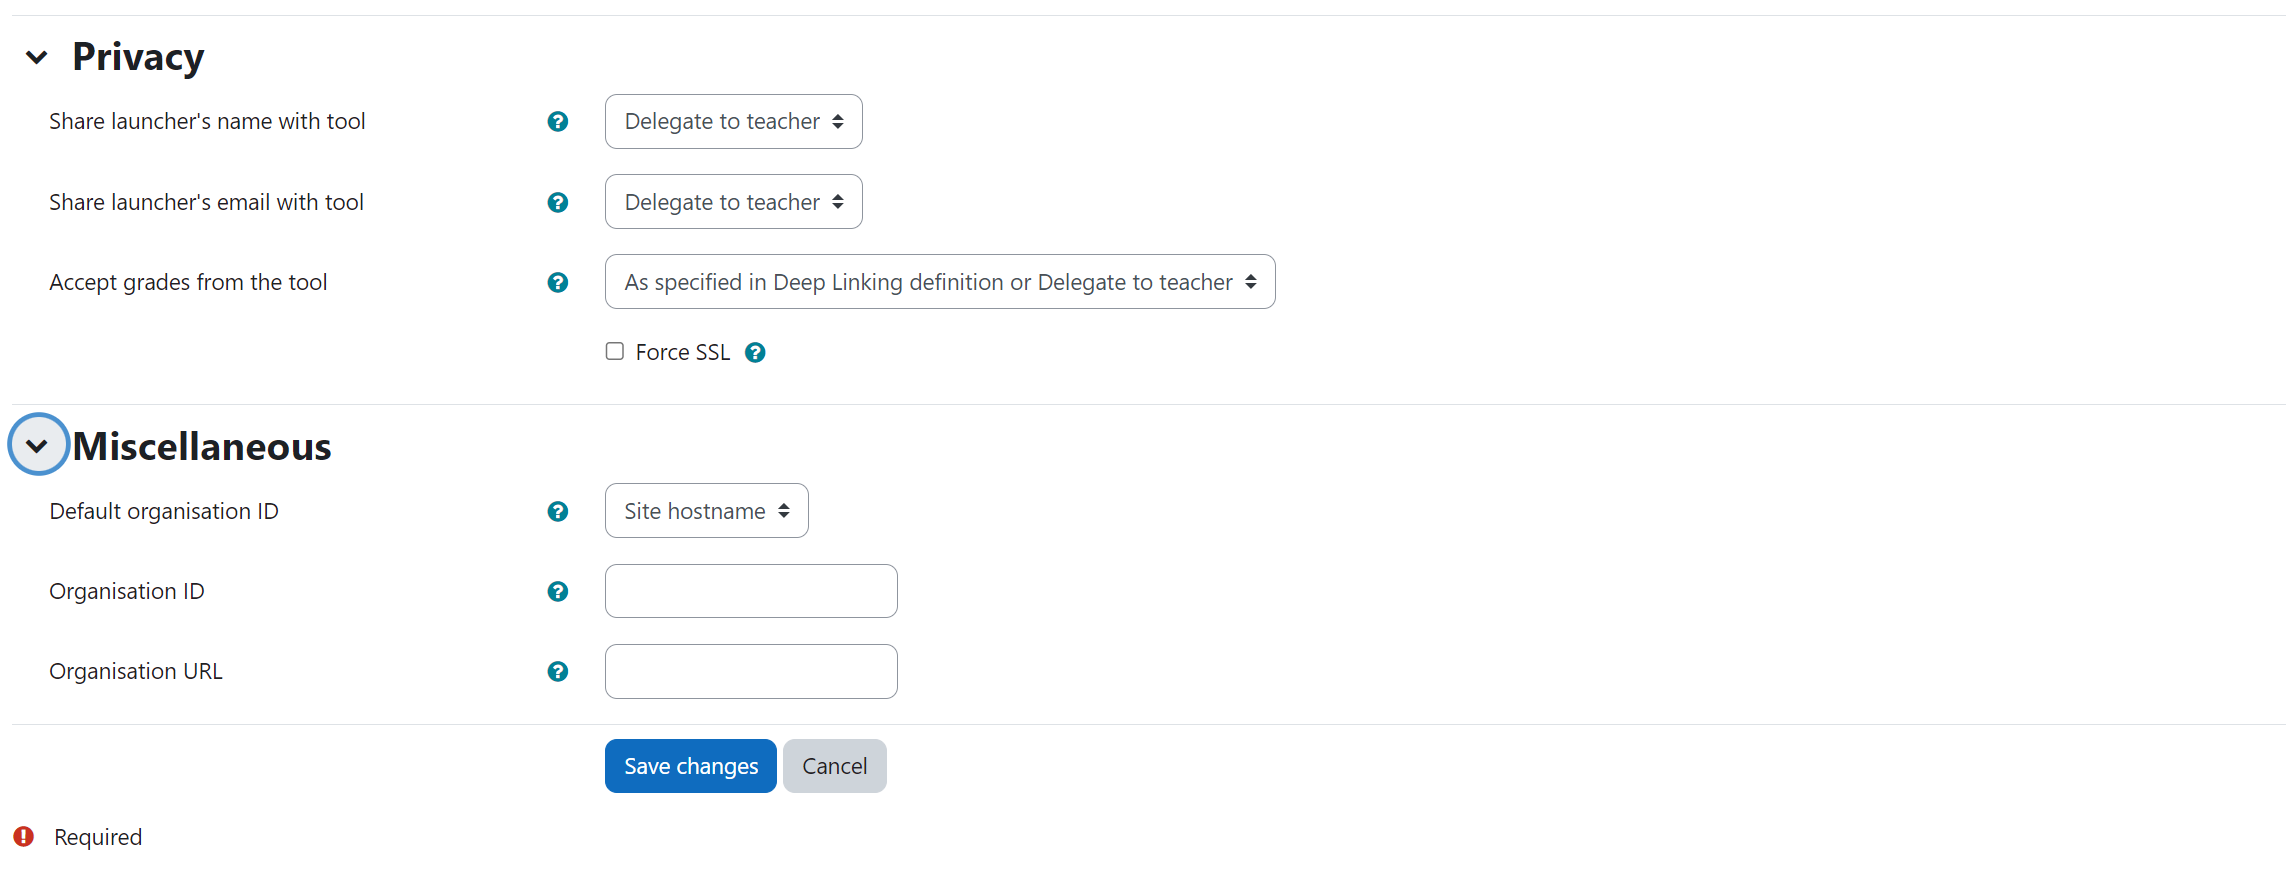
- Services and Privacy settings can be configured based on institutional preferences but we want to make sure that grade sync / column management and student info passback is enabled if you want to see the student name and get the full exchange of information with the LTI game.
- Deep Linking options should be enabled.
- Under Miscellaneous, I made sure that my tool appeared in all courses for my entire site, selecting Site Hostname.
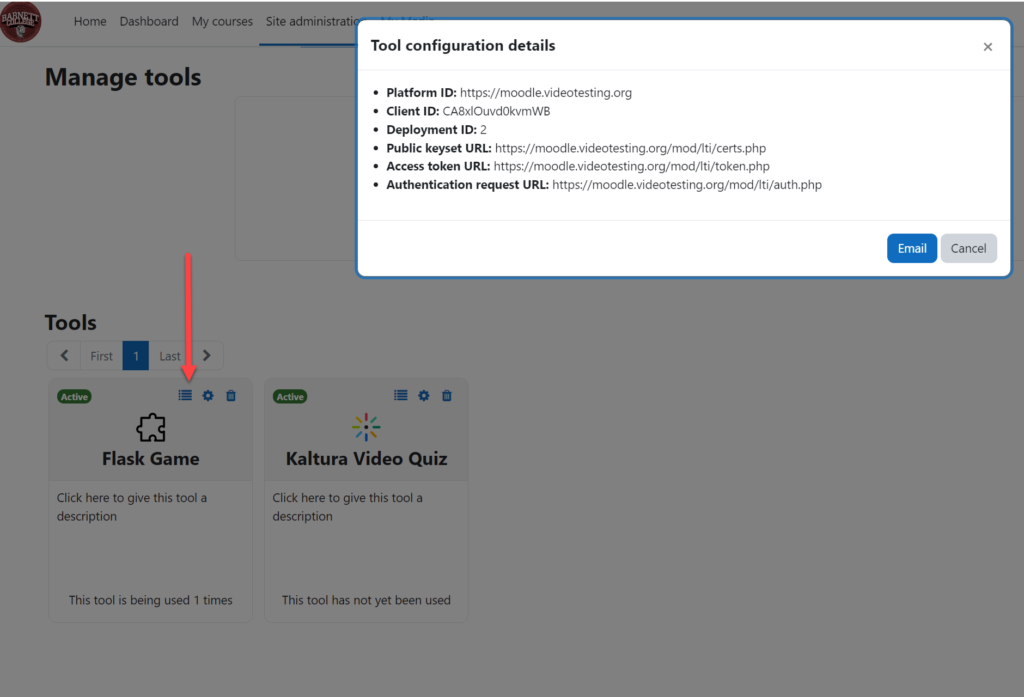
Once the changes are saved, you can grab what you need by going back to Site Administration -> Plug-ins -> Activity Modules ->External Tool -> Manage Tools and selecting the “View Configuration Details” button on the card for the Flask Game tool that was just created. From there you can grab the Client ID, URLs, and Deployment ID info needed by the too configuration in Step 1.
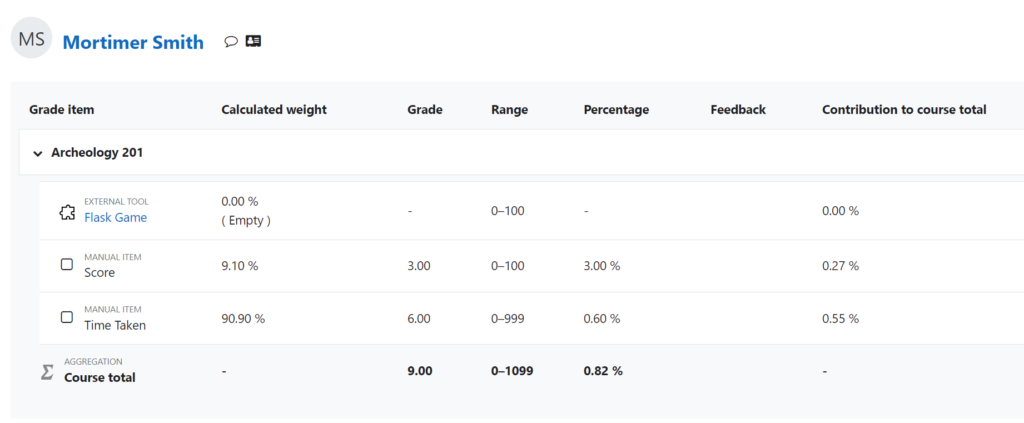
After all has been saved. Let’s test with a student in a course!
As the instructor, if I have a look at the gradebook in my course, I can see Morty’s scores. Granted, I probably need to change the range based on the difficulty of the game, etc.